Showing posts with label Fire Island Rustic Bakeshop. Show all posts

Friday, February 19, 2016

Alaska-grown whole wheat bread soon to be offered at Fire Island Rustic Bakeshop


Carlyle Watt, head baker at Fire Island demonstrating how to make foccaccia.

       Fire Island Bakeshop is adding new breads to its repertoire, made with wheat from Ben VanderWeele's farms in the Knik Valley. I wrote about VanderWeele's Farm's wheat last July.

Ben VanderWeele shows off a stalk of green wheat in July, 2015, about six weeks before harvest.

       Carlyle Watt, head baker at Fire Island, said that the new breads will go on to the menu in March, 2016, baked twice a week.  The VanderWeele wheat has about 10% to 12% gluten, perfect for Fire Island's whole wheat sourdough loaf. He also plans to use the Alaskan wheat in other breads, experimenting each week with new possibilities until he achieves a texture and taste that he likes.

Ben VanderWeele with a  handful of his 2014 crop of wheat.

      We talked about several aspects of wheat farming, and how they shaped Fire Island's choice to buy local. I asked about "organic" versus "natural, " knowing from my conversation with Ben VanderWeele last July that his wheat is not organic. Ben said at that time that Alaskan farmers have very few diseases in the soil, or natural pests, because agriculture is so new to the state. Although most of the Valley farmers supplement the minerals in the dirt with fertilizers, few use pesticides.

       Carlyle's view is that although he would prefer organic, VanderWeele wheat has a low "carbon footprint," no pesticides, supports the local economy, and helps create more sustainable food supplies for Alaska. He said that Fire Island weighs all of those factors and more in deciding how to most ethically choose their flours and other ingredients. Eventually, he thinks that tasting the freshness and unique flavors of the Alaskan wheat will increase the market, and in the long run make it more feasible for local farmers to grow organic foods.

Ben VanderWeele talking about growing wheat in Alaska.

     Carlyle showed me the bakery's table-top mill that they use to grind the wheat, as well as for other grains -- wheat's cousins, emmer, einkorn, and spelt, and for rye. We talked about the difference between fresh-milled flour, and flour that's been "aged" by sitting for a couple of weeks before being used for baking. Fire Island uses both types, for different purposes -- the aged flour is better for pastries and some types of breads because it gives an open and airy "crumb" (the interior texture of the bread). The VanderWeele wheat will be fresh-milled and used immediately to capture flavors that otherwise change as the flour ages. The bread's texture will be a little denser, but complex in taste.

Fire Island's table mill for wheat and other grains.

     The mill grinds two to three pounds of whole grains at a time, and takes a couple of minutes to turn them into flour. It gives a choice of grinds, from fine, for pastry, to a grind that maintains more of the bran. Carlyle said that if the grain is at room temperature when it goes into the mill, the flour comes out heated to about 100 degrees. To keep the flour from overheating, which changes the flavors, the bakery stores its grains out of doors in the winter and refrigerates them in the summer.

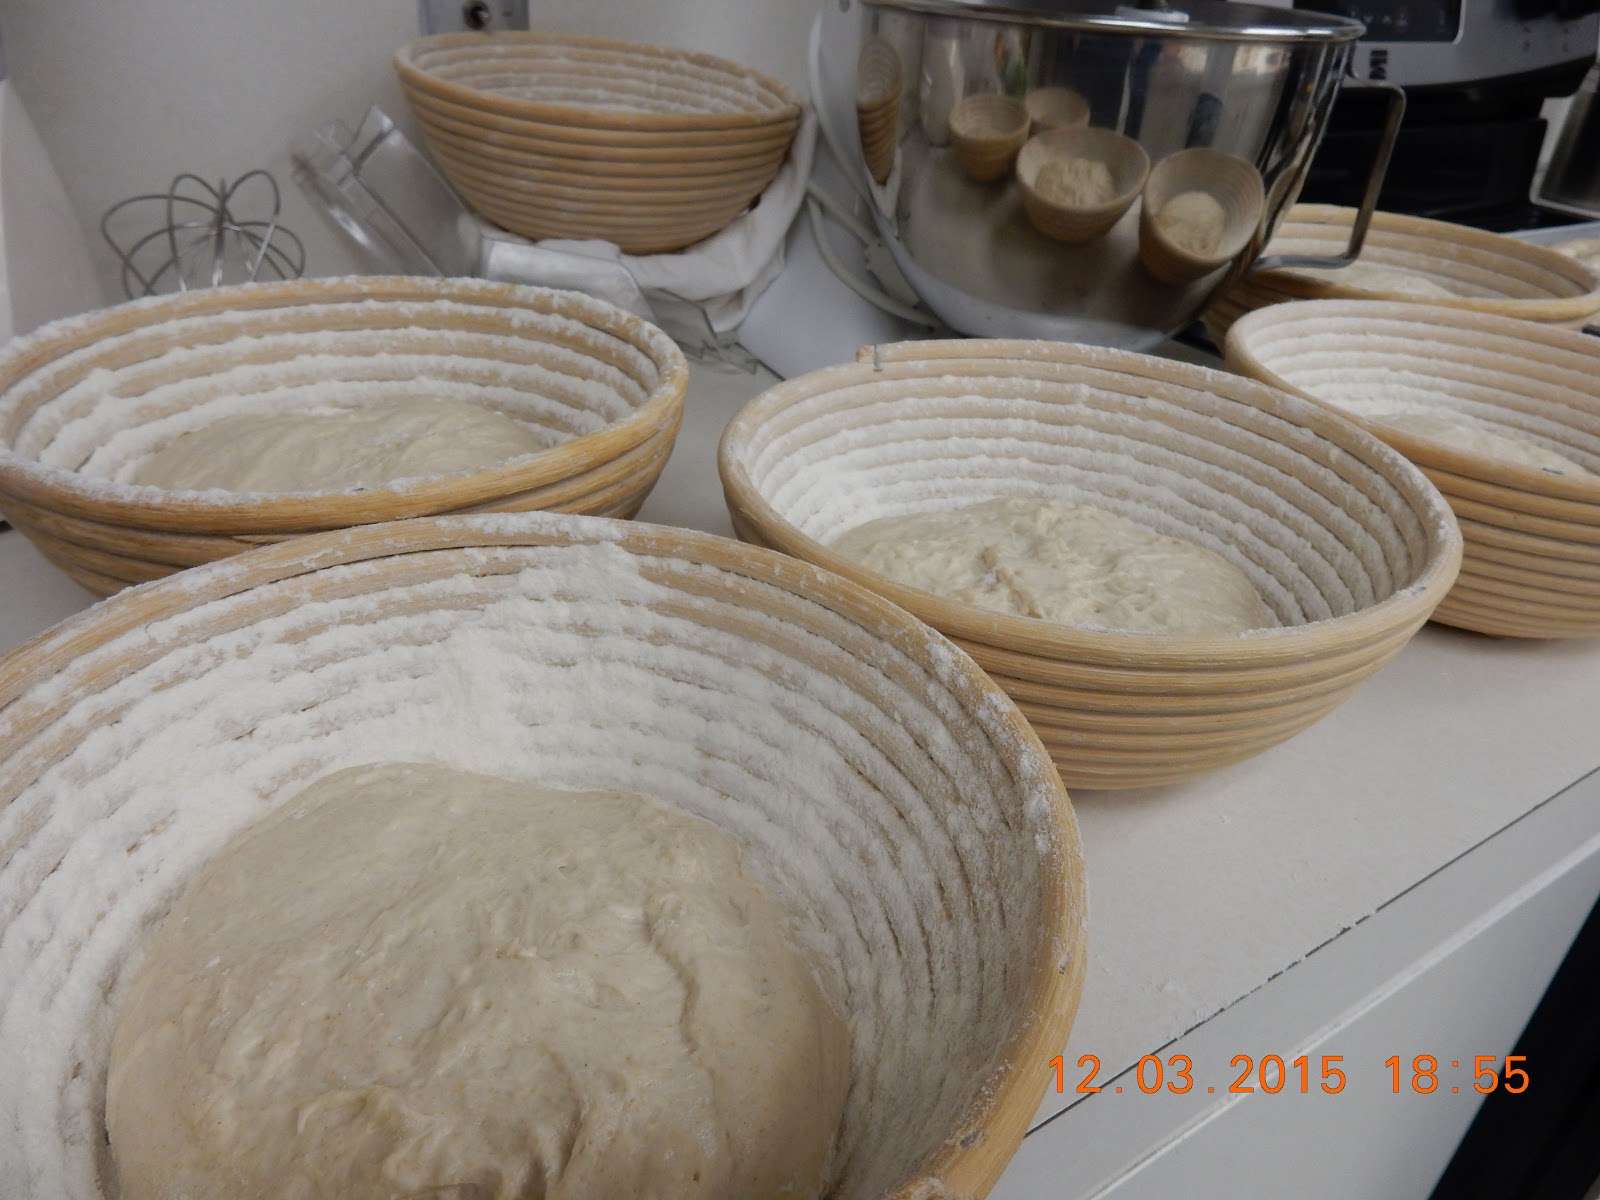
These are Fire Island's Rustic Wheat loaves; the new breads with local wheat will be similar.

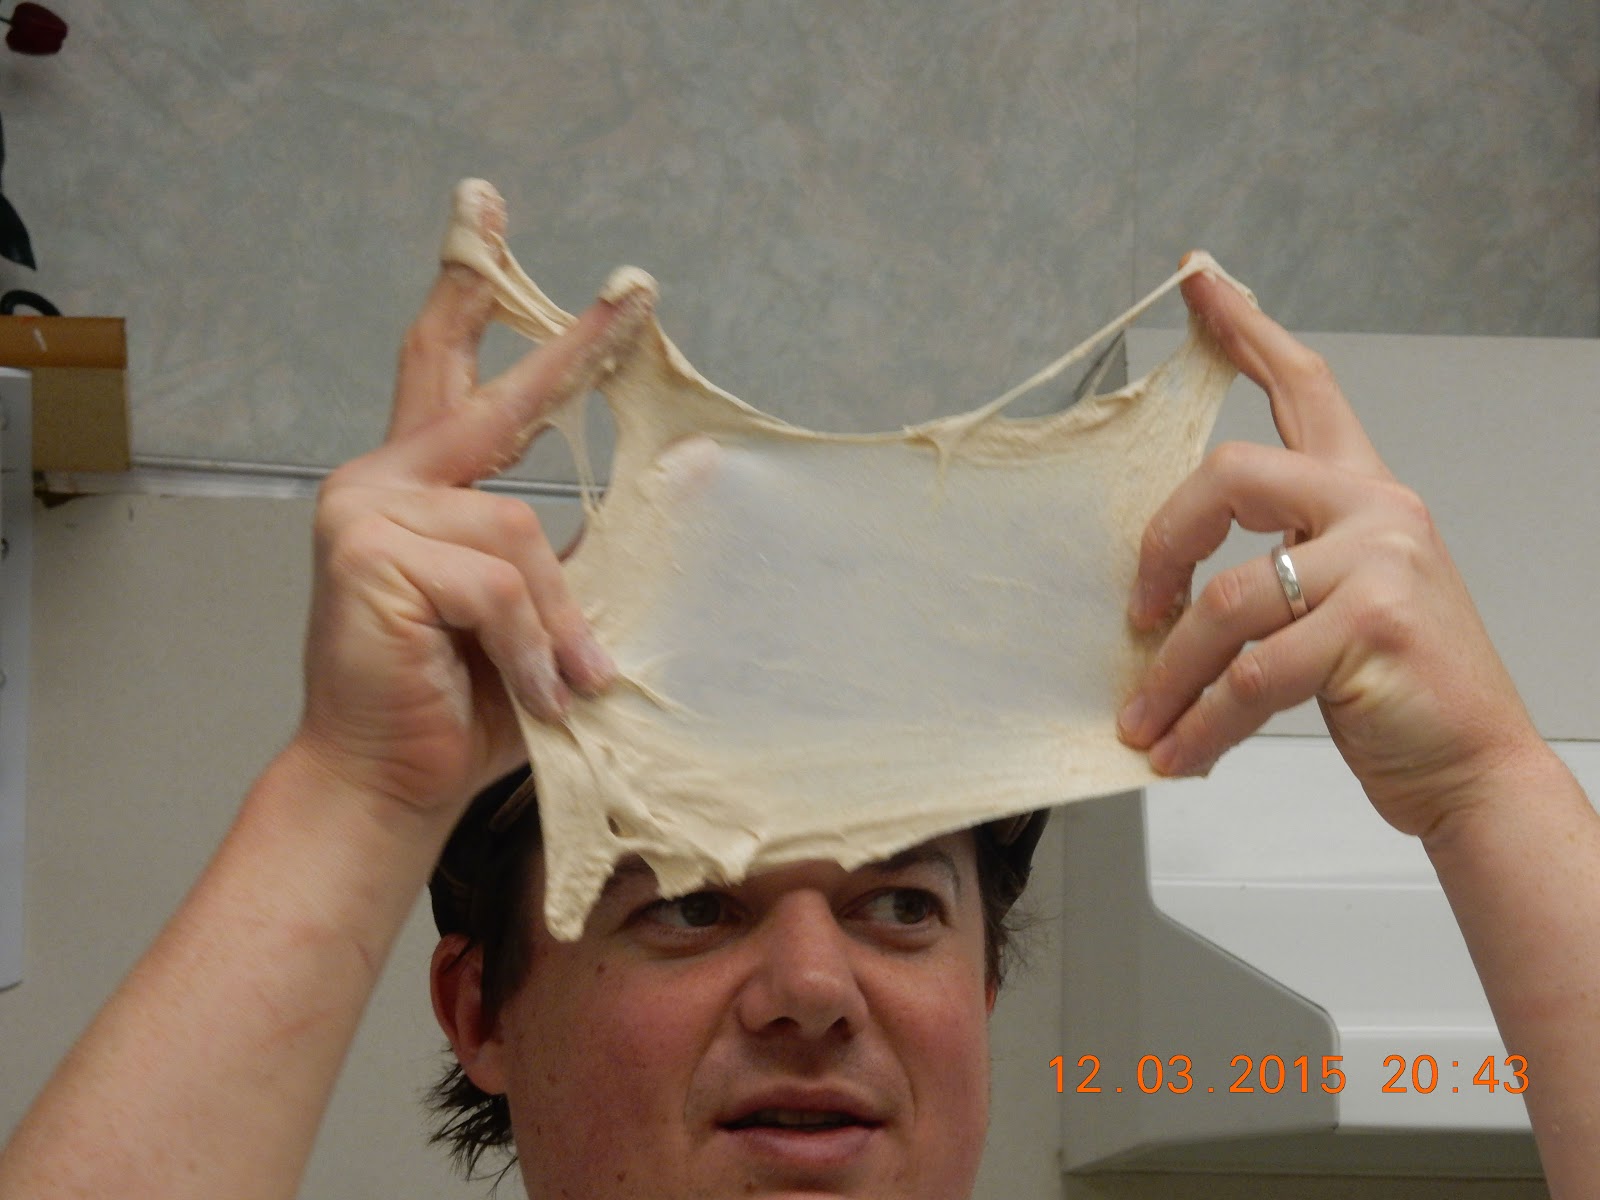
      We discussed the sourdough starters, and how they interact with the different grains. Carlyle said that sourdoughs, also known as natural yeast starters, are individual. A batch of yeast starter fed on rye flour has a distinctly more intense smell (Carlyle describes this as "funky" which in the baking business tend to mean something earthy and dark) than one fed on whole wheat, or on white (wheat) flour. Of the three, the white flour starter is often almost sweet in scent, while the whole wheat and rye are sour and can be intense. Fire Island's sourdough whole wheat breads will be made with the whole wheat starter, to highlight the flavors. He added that Fire Island has a number of customers who are sensitive to commercial yeasts, but who are fine with the sourdoughs made with the natural yeasts.

Carlyle weighing chunks of dough to assure that each bread loaf is the same so that they bake evenly.


Ben VanderWeele's wheat near harvest time, September 5, 2015, with the Chugach Mountains in the background.


      Fire Island Rustic Bakeshop has two shops now, at 1343 G Street, near downtown Anchorage, and at 2530 East 16th Avenue, just off Lake Otis and DeBarr. They are open Wednesday through Sunday, 7:00 a.m. to 6:00 p.m.; closed Monday and Tuesday.


Sunday, December 6, 2015

Secrets of Fire Island Foccacia and Soudough -- a Baking Class


Carlyle Watt, chief baker at Fire Island Rustic Bakeshop, with a batch of sourdough ready to make into loaves.

Fire Island classes serve three purposes -- students learn the secrets of baking delicious things; they go home with plenty of loaves or cookies to demonstrate that they have actually acquired the skill, and they appreciate much more the fact that Fire Island will do all of that baking for them. Along with seven other engaged students, I took Carlyle's class on sourdough and foccacia on December 3. For three hours we mixed, folded, and baked loaves of sourdough bread, and cut up toppings for the trays of foccacia. We left with loaves of fresh bread, slices of foccacia, and our own sourdough starters for many generations of home-made breads.

Shaping and baking sourdough loaves, using dough that's ready for the final stage


Weighing the dough cut from the big chunk above to make individual loaves.

Here's where it starts -- with the scales. Bread-making may be an art, but like other arts, its roots are deeply twined in the sciences. Physics, biology, chemistry, and math are all critical to creating bread that's edible and beautiful. Sciences are precise -- so bread-making starts with weighing everything. Carlyle cut pieces from the mass of dough that he started with, and showed us how to shape them into rounds.


Hands are perpendicular to the table, cup the loaf, and turn it lightly, shaping it into a round. The small pile of flour in the middle of the table is for flouring hands to make the process smoother. The huge bag of organic unbleached white flour that is used in all of Fire Island's  creations is from Central Milling Company in Utah (available at Natural Pantry in Anchorage in more manageable quantities).

Once shaped, the loaves are set in place for their final rise. Carlyle is gently placing a round of dough into a proofing bowl that will give the loaf a classic "boule" (French for "ball") shape with the rings of the bowl imprinted on the final loaf.  Before putting the dough in, he dusted the inside of the bowl with flour so that dough wouldn't stick to it. We also learned how to fold a couche, a heavy piece of cloth so that it would support the rising loaves.


A stack of proofing bowls.


Boules on their final rising.


We baked the boules either in a cast iron Dutch oven, or on a pizza stone in the oven. Here's a close to perfect boule in the Dutch oven where it was baked. The loaves baked on the pizza stone turned out a little flatter than those in the Dutch oven, but just as light and tasty.

Carlyle shows us what it looks like on the bottom when done: well-browned, crusty. When tapped lightly with fingertips, it sounds and feels hollow.


The texture of the sliced bread is open with lots of good-sized holes that have thin membranes. It smells delicious and tastes better. In theory, you would let it cool a bit before slicing, but the class had eight hungry people, eager to taste the fruits of their work.

Mixing and shaping, and raising our own dough.

Measuring water using the scales.

For the next major part of the lesson, we mixed our own dough to take home and bake later, carefully measuring the water first, then the white and whole wheat flours and the leaven (starter), and mixing thoroughly. The dough needed to sit for half an hour so that the flour could absorb water (the technical term is "autolyse"). Next we added the salt and a bit more water, and mixed again.

Mixing the dough -- it's wet and sticky.

Carlyle showed us how to make a sourdough country loaf using Chad Robertson's method of starting with a wet dough, and then folding and resting it several times over three hours. There are many other methods of allowing gluten strands to develop and shape the bread, and the yeasts to work their magic. The yeasts need time to eat the flour and convert its sugars into carbon dioxide and alcohol. The proteins that make stretchy gluten hold the carbon dioxide bubbles into place, giving the bread its texture; the alcohol burns off.

Pulling up the dough to fold it over itself eight to a dozen times substitutes for the more traditional kneading to develop the dough.

The folding is gentler, and allows the larger holes and more open texture of the sourdough loaf. If the same dough was going to be kneaded, it would start as a drier dough. After the kneading, the final loaf would have a finer, more even texture.


Making foccacia

Finally, foccacia -- my main reason for taking the class was to discover the secret of this flatbread.

Carlyle made the foccacia dough in an automatic mixer. The ingredients differ in a couple of ways from the the sourdough loaf - the foccacia dough has some olive oil, a very small amount of commercial yeast to keep it more consistent in flavor and texture, and a higher percentage of whole wheat flour to white flour.


After "developing" the gluten in the dough by continuing to mix it in the machine at a higher speed for several minutes, we set it aside to rise. How to know if it's ready? Carlyle is demonstrating the "window-pane" test -- stretching a little piece of dough gently to see if it can be pulled so thin that you can see through it. When it's reached this stage, it's ready to rest and rise  for about an hour.


After rising, foccacia dough is spread in the baking pan, with a thin layer of olive oil beneath.

The top is dimpled from the pressure of finger tips pushing it to the edges -- the idea is to work gently so that the trapped gasses don't get pushed out.

For toppings we used caramelized onions,

sliced mushrooms, and diced sweet potatoes. Then the dough needed to rise for another half hour before baking.


The mushroom foccacia baked for about 25 minutes in a 400 degree oven. We pulled it out, spread on the caramelized onions, and added some chunks of cheese; then baked it again for about five minutes until the cheese melted.


This is the finished sweet potato foccacia, garnished with arugula leaves, already a quarter gone just a few minutes after it came out of the oven..


Students savoring the foccacia.


My home-baked loaf -- not the perfect shape, but its crumb is very good, and it tastes just like Carlyle's.

For more information about Fire Island classes, click here.   

Fire Island Rustic Bakeshop has three locations now: the original shop at 1343 G Street (the entrance to the shop is around the corner on 14th Avenue), and 2530 East 16th Avenue, just south of DeBarr and east of Lake Otis. The newest Fire Island shares the parking lot, a beer, and much else with Anchorage Brewing. It's at 160 West 91st Street (off King Street).


Tuesday, October 27, 2015

Creating Croissants at Fire Island Rustic Bakeshop


Sammy's birthday present was a class on making croissants and Danish pastries at Fire Island Rustic Bakeshop, He's just finished adding the blackberries and raspberries to a pan of cream-filled Danish pastries. 

The Danish pastries, hot from the oven. Note the ways in which they are ideal -- rich brown tones, a slight shine from the whole-egg glaze, lots and lots of flaky layers visible because they were layered and cut correctly, berries still whole and plump.

What's a delicious way to spend a Monday evening? Baking croissants and Danish pastries at Fire Island Rustic Bakeshop comes right at the top of the list. Ten people assembled on October 19 to learn the secrets of Anchorage's best croissants. Rachel Saul taught the class, with April and Lisa assisting. The pay-off, after three hours on our feet, was boxes full of croissants that we'd shaped and baked -- traditional, chocolate-filled, ham and cheese -- and Danish pastries with cream cheese or frangipane and berries.

A perfect chocolate croissant, with crisp egg-glazed crust, too many layers to count, and plenty of chocolate.

There are many magical treats wrapped in wheat flour. One of the most mysterious is the combination of a yeast dough and pure butter, layered together in a "laminated" pastry. It's also called Viennoiserie dough, and is rich with eggs and sugar.Croissants, Danish pastries (which in Denmark are called Viennese bread), and brioches are examples. All are made from a thin slab of butter, wrapped in dough, then folded and rolled, again and again, to make dozens of fine layers. When the pastries are baked, the water in the butter turns to steam and keeps the layers separate. The proteins in the flour and butter, and the egg glaze all combine to create the crisp brown crust.

April pouring drinks for us before class starts.

As we came into the warm bakery, April and Lisa handed us Fire Island aprons, and offered us foccacia, coffee, and drinks. Rachel gave us each a sheaf of recipes and notes, and led us into the back kitchen. We did every step needed for making croissants, from measuring the ingredients to mixing the dough, rolling it and laminating it with the butter, filling and shaping the pastries, baking them, and of course, eating them at the end. 

Rolling a croissant into the classic shape.


The most important thing to know about making croissants is that you are learning a technique for making layers of dough and butter. Butter melts at room temperature (and bakeries tend to be much warmer than most rooms), so the trick to keeping it layered with the dough rather than melting into it is to keep everything cold.


Mixing the dough with the industrial-strength machine.

  • The dough gets mixed in two stages, beginning with egg yolks, flour (Fire Island uses a mix of organic all-purpose white flour and some whole wheat), water, and pre-ferment (a chunk of yeasted dough that has been rising for at least a day), and let this rest for twenty minutes. The resting (technical name, "autolyse," which means to take up water by itself) lets the flour soak up some of the water. 

  • Add the yeast and salt, and mix thoroughly. Then add the sugar and butter, gradually. Continue mixing until the dough all looks the same.
Window pane test -- this dough has enough gluten development that it can be stretched thin to let the light through without tearing. It's ready to start working with.
  • Continue mixing until you can take a piece of dough and stretch it very thin -- called the window pane test. That shows that the gluten is beginning to "develop," that is, to make the chains of gluten proteins that make wheat-based doughs so stretchy. The gluten chains will capture the carbon dioxide bubbles that the yeast is making as it eats the starches in the flours and turns them into sugars.
  • Separate the dough (depending on how much you are making) into "pillows" -- somewhat rounded but flat pieces of dough. Cover them tightly with saran wrap or other flexible plastic and put into the freezer for about an hour. The essential steps that make the croissants so flaky mostly have to do with keeping the dough and the butter chilled. Take the pieces of dough out of the freezer and roll out into flat sheets about 4 millimeters (three-eighths of an inch) thick. Wrap and freeze again until solid. 

Slicing the  Plugra butter (very high in butter fat) for the butter layers in the croissants.
  • Next, flatten the butter.

Rachel pointing out the thickness of the partially rolled butter. She sliced the butter thin, put it between two sheets of silicone, and used the "sheeter" machine to roll it out to 1/4 inch thick.

A rolling pin works too, and the workout saves you a trip to the gym.

 The 1/4 inch sheet of butter laid onto the dough.


Folding the dough over the butter for the first time.
  • Put the layer of butter onto the sheet of dough, and fold it (instructions are here at traceysculinaryadventures.com   -- she has excellent photos and descriptions of the layering, folding, and rolling processes).
Rachel covering the dough with plastic to keep it from drying out, before putting it in the freezer.
  • Once the first set of folding and layering is done, the dough goes into the freezer for an hour or so. 
Folding and running the dough through the sheeter -- we did this several times.
  • When it comes out, it gets folded and turned and folded again. Then it goes back into the freezer for at least twenty minutes. When it comes out, it's ready to be rolled out, cut and shaped into croissants.   

Class members shaping classic croissants.
  • At this point, it's time to pre-heat the oven to 350 degrees. A website (traceysculinaryadventures.com) shows one way to cut and shape the croissants; the photos below show the Fire Island way. Rachel emphasized using a very sharp knife or pizza cutter, and taking care to keep the cut edges safe from being crimped or mushed together so that as the dough rises the layers stay separate and can puff up during proofing and baking. 

Partially trimmed dough, with the box of chocolate bars. The trimmings from the pastries, like the piece in front, get tossed with cinnamon and sugar and baked into monkey bread.


 Rachel measures and trims the sheet of dough before using a five-bladed cutter for the chocolate and ham and cheese croissants. Consistency is critical -- the customer (you and me) wants the same wonderful chocolate croissant every time.


The properly rolled chocolate croissant, with two chocolate bars in each one. The seam of the croissant goes flat against the tray (which is lined with parchment paper).
  • Set the shaped croissants on a baking sheet lined with parchment paper leaving a couple of inches on all sides. Cover them with a sheet of plastic or plastic wrap, and set them to "proof" in a warm place for twenty to thirty minutes (that is, to rise -- they should get to be about twice the size they were when you first shaped them).
 Danish pastries filled, decorated, and ready to bake. The back two have a cream cheese filling topped with blackberries; the front two are filled with frangipane, a sweet almond mixture.

Into the oven -- note how far apart they are on the baking sheet, to make sure that they have maximum space to rise and brown.
  • When you're ready to bake them brush the tops lightly with a pastry brush dipped into a beaten whole egg. Be sure to only brush the tops. If the egg gets onto the cut edges, it will seal them so that they don't spread apart to make the flaky high-puffed desirable croissant.
Finished croissants, ready to savor.
  • Bake them for about nine minutes, then turn the pan around to make sure that they are baking evenly, and bake another nine minutes or until dark golden brown. 

Rachel showing the many-layered interiors, and the exteriors that flake onto the pan because the top layers baked just right.


For hours or to contact Fire Island, click here. They have the same hours (7:00 a.m. to 6:00 p.m.) at both their South Addition location (1441 G Street) and their brand new Airport Heights location (16th and Logan, just off Lake Otis).


The new Fire Island on a rainy opening day.