
Fire Island classes serve three purposes -- students learn the secrets of baking delicious things; they go home with plenty of loaves or cookies to demonstrate that they have actually acquired the skill, and they appreciate much more the fact that Fire Island will do all of that baking for them. Along with seven other engaged students, I took Carlyle's class on sourdough and foccacia on December 3. For three hours we mixed, folded, and baked loaves of sourdough bread, and cut up toppings for the trays of foccacia. We left with loaves of fresh bread, slices of foccacia, and our own sourdough starters for many generations of home-made breads.
Shaping and baking sourdough loaves, using dough that's ready for the final stage

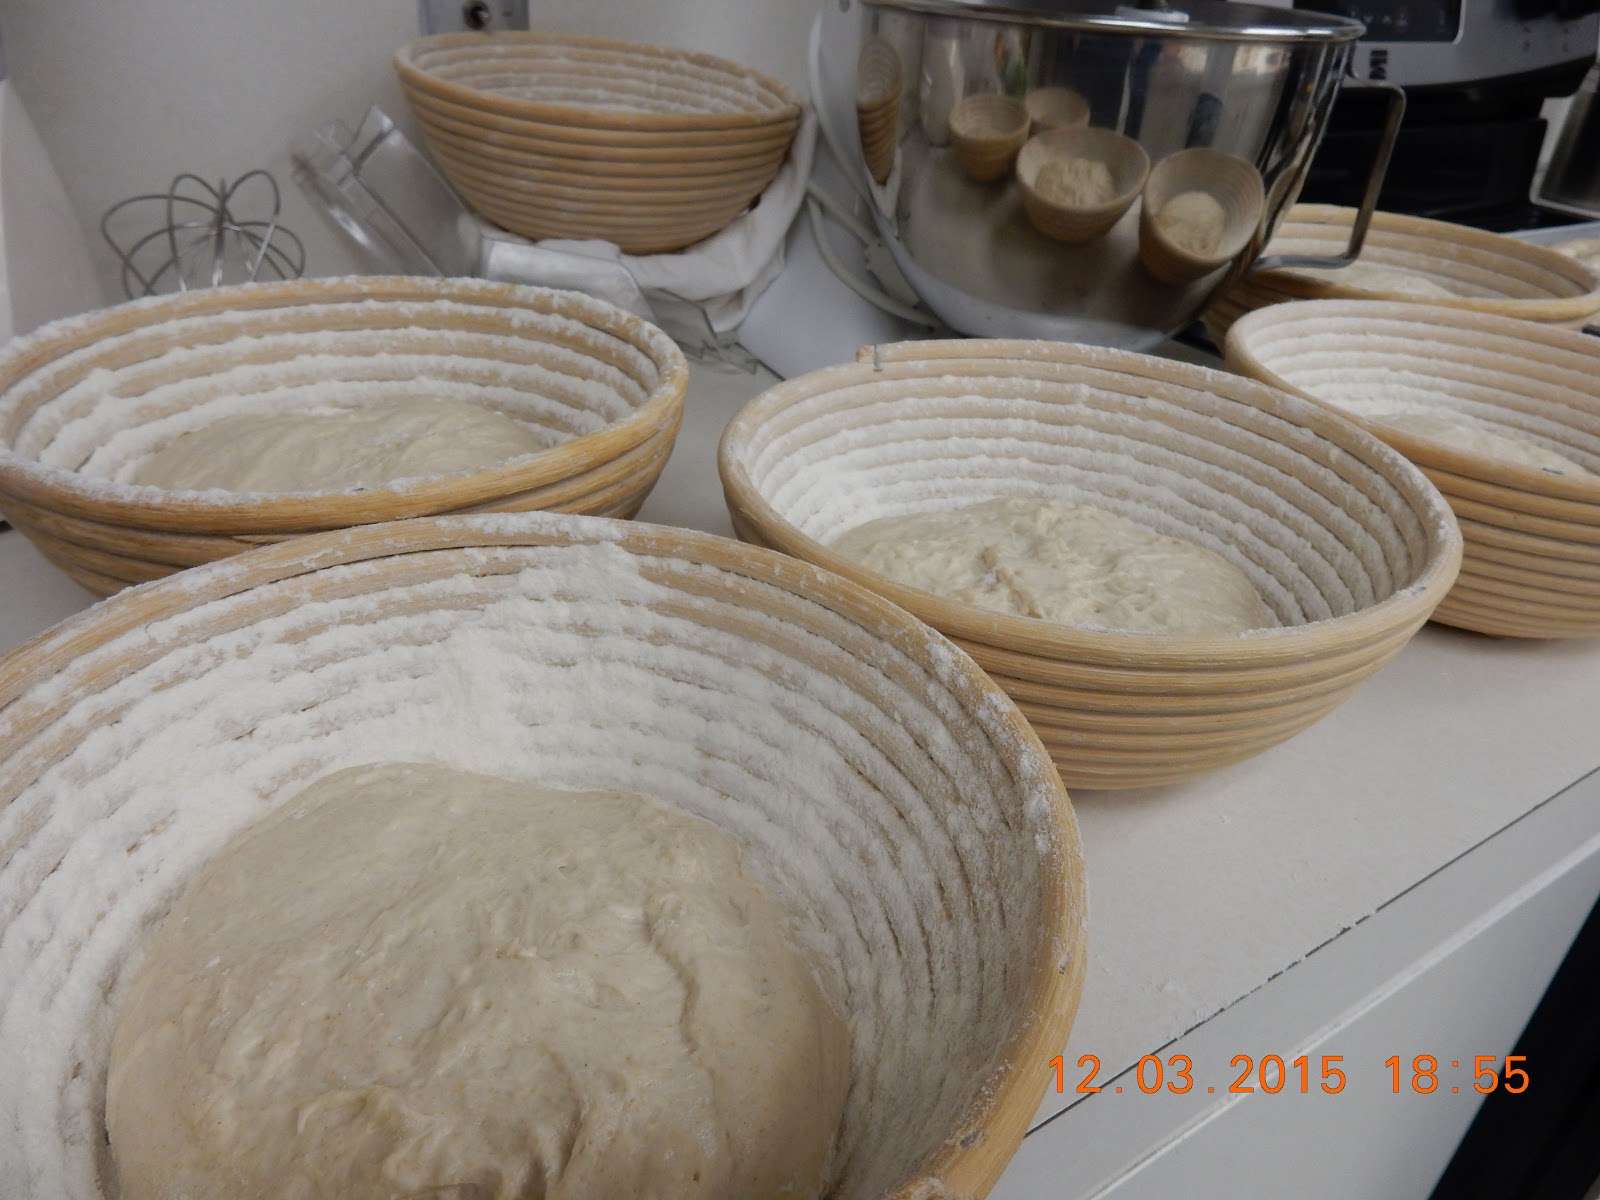
Here's where it starts -- with the scales. Bread-making may be an art, but like other arts, its roots are deeply twined in the sciences. Physics, biology, chemistry, and math are all critical to creating bread that's edible and beautiful. Sciences are precise -- so bread-making starts with weighing everything. Carlyle cut pieces from the mass of dough that he started with, and showed us how to shape them into rounds.


We baked the boules either in a cast iron Dutch oven, or on a pizza stone in the oven. Here's a close to perfect boule in the Dutch oven where it was baked. The loaves baked on the pizza stone turned out a little flatter than those in the Dutch oven, but just as light and tasty.


Mixing and shaping, and raising our own dough.

For the next major part of the lesson, we mixed our own dough to take home and bake later, carefully measuring the water first, then the white and whole wheat flours and the leaven (starter), and mixing thoroughly. The dough needed to sit for half an hour so that the flour could absorb water (the technical term is "autolyse"). Next we added the salt and a bit more water, and mixed again.

Carlyle showed us how to make a sourdough country loaf using Chad Robertson's method of starting with a wet dough, and then folding and resting it several times over three hours. There are many other methods of allowing gluten strands to develop and shape the bread, and the yeasts to work their magic. The yeasts need time to eat the flour and convert its sugars into carbon dioxide and alcohol. The proteins that make stretchy gluten hold the carbon dioxide bubbles into place, giving the bread its texture; the alcohol burns off.

The folding is gentler, and allows the larger holes and more open texture of the sourdough loaf. If the same dough was going to be kneaded, it would start as a drier dough. After the kneading, the final loaf would have a finer, more even texture.
Making foccacia

Carlyle made the foccacia dough in an automatic mixer. The ingredients differ in a couple of ways from the the sourdough loaf - the foccacia dough has some olive oil, a very small amount of commercial yeast to keep it more consistent in flavor and texture, and a higher percentage of whole wheat flour to white flour.
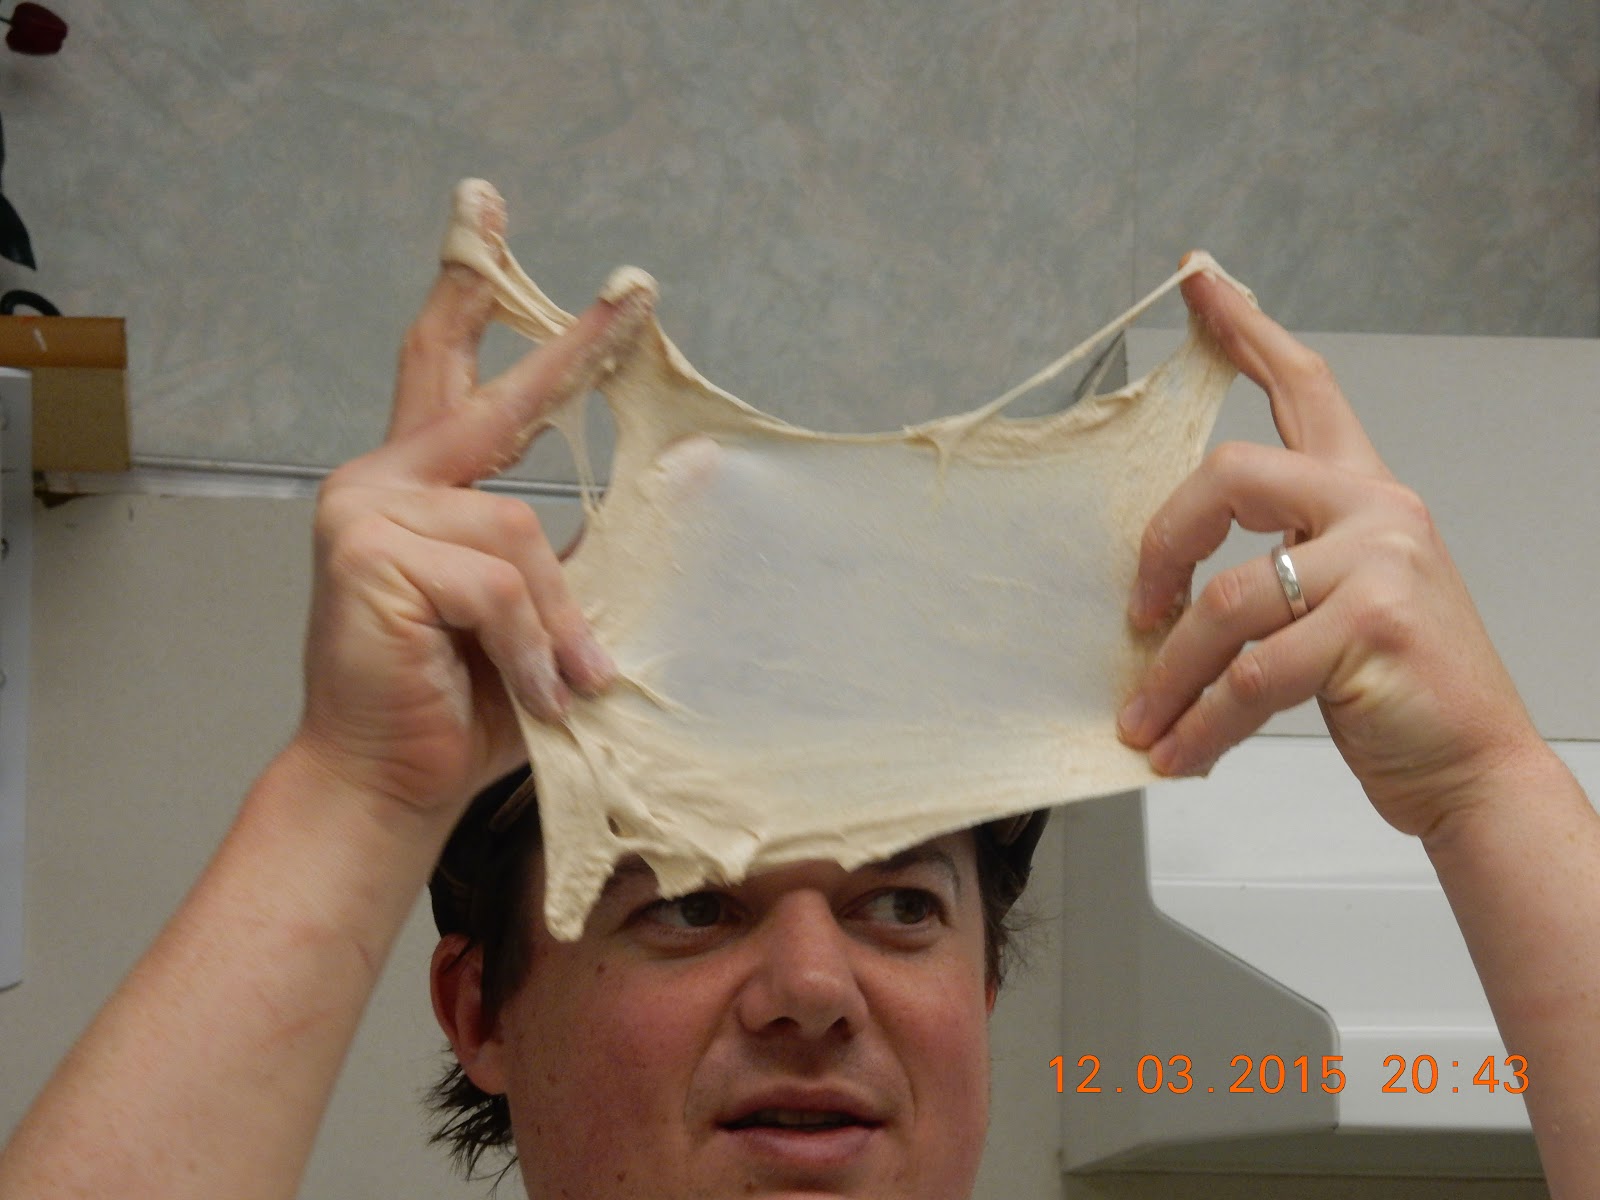
After "developing" the gluten in the dough by continuing to mix it in the machine at a higher speed for several minutes, we set it aside to rise. How to know if it's ready? Carlyle is demonstrating the "window-pane" test -- stretching a little piece of dough gently to see if it can be pulled so thin that you can see through it. When it's reached this stage, it's ready to rest and rise for about an hour.

The top is dimpled from the pressure of finger tips pushing it to the edges -- the idea is to work gently so that the trapped gasses don't get pushed out.


For more information about Fire Island classes, click here.
Fire Island Rustic Bakeshop has three locations now: the original shop at 1343 G Street (the entrance to the shop is around the corner on 14th Avenue), and 2530 East 16th Avenue, just south of DeBarr and east of Lake Otis. The newest Fire Island shares the parking lot, a beer, and much else with Anchorage Brewing. It's at 160 West 91st Street (off King Street).
No comments:
Post a Comment